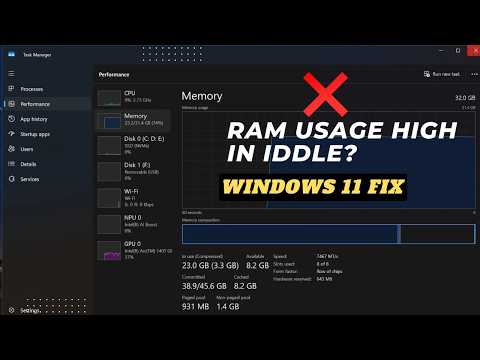
Windows 11 laptops with 8GB or 16GB of RAM often idle at 55% to 75% memory usage with no apps open. This leaves little room for browsers, Office tools, or light multitasking and causes frequent stutters. This guide walks through six built-in Windows 11 fixes to lower idle RAM usage without installing third-party cleaner apps.
Why Windows 11 Uses High Idle RAM on 8GB and 16GB Laptops
Windows 11 manages memory differently from older operating systems. By design, it preloads common system libraries into RAM so apps launch faster when you click them. On an 8GB laptop, seeing 45% to 55% usage at idle is normal. On a 16GB laptop, 25% to 35% is typical.
However, active memory climbing past 65% with every window closed points to a real problem. Startup utilities, background Microsoft Store apps, and browser preloading services quietly claim gigabytes right after login. Additionally, outdated network or graphics drivers can cause memory leaks that hold onto RAM even after you close programs.
Because Windows clears cached standby memory automatically when apps need it, third-party “RAM booster” tools rarely help. Instead, trimming unnecessary startup tasks and background processes using built-in Windows tools frees real usable memory safely.
1. Disable Unnecessary Startup Apps in Task Manager
Many desktop programs register themselves to launch automatically when Windows boots. Game launchers, cloud sync tools, and OEM helper utilities often stay resident in RAM all day, even when you never open them.
-
Press Ctrl + Shift + Esc to open Task Manager.
-
Click the Startup apps icon in the left sidebar.
-
Click the Startup impact column header to sort the heaviest items to the top.
-
Right-click any non-essential program—such as Steam, Spotify, Teams, Adobe updaters, or manufacturer bloatware—and select Disable.
-
Leave audio drivers, touchpad software, and Windows Security notification icon enabled.
After disabling unwanted startup items, restart your laptop and reopen Task Manager > Performance > Memory. You should immediately see lower baseline usage.
2. Restrict Background App Permissions in Windows Settings
Microsoft Store apps frequently run hidden background tasks to sync notifications, index photos, and refresh live feeds. On an 8GB laptop, five or six idle Store apps can easily consume 800MB to 1.5GB of memory.
-
Open Settings > Apps > Installed apps.
-
Scroll through the list to locate built-in apps you rarely use, such as Phone Link, Clipchamp, Microsoft Photos, Xbox, or News.
-
Click the three-dot menu (…) beside an app and select Advanced options.
-
Under Background apps permissions, click the dropdown menu for Let this app run in background.
-
Change the setting from Power optimized or Always to Never.
Repeat these steps for other unused Microsoft Store apps. Next, check Settings > System > Notifications and turn off alerts for apps you do not monitor regularly.
3. Turn Off Microsoft Edge Startup Boost and Background Extensions
Even if you use Google Chrome or Firefox as your default browser, Microsoft Edge often runs silently in the background. Its Startup Boost feature preloads core browser processes as soon as Windows starts, occupying 300MB to 700MB of idle RAM.
-
Open Microsoft Edge and click the three-dot menu (…) in the top-right corner.
-
Select Settings, then click System and performance in the left menu.
-
Toggle off Startup boost.
-
Right below it, toggle off Continue running background extensions and apps when Microsoft Edge is closed.
-
Close Microsoft Edge completely.
If you use Google Chrome as your primary browser, open Chrome > Settings > System and toggle off Continue running background apps when Google Chrome is closed as well. This keeps browser memory at zero whenever no windows are open.
4. Disable Windows Widgets and Trim Visual Effects
The Windows 11 Widgets board runs an embedded WebView2 browser process in the background to refresh news, weather, and stock cards. On 8GB and 16GB laptops alike, this single service frequently holds 250MB to 500MB of RAM while sitting untouched.
-
Right-click an empty spot on the taskbar and click Taskbar settings, or open Settings > Personalization > Taskbar.
-
Under Taskbar items, toggle off Widgets.
-
If you do not use Copilot or Task view, toggle those off from the same screen.
-
Next, press Win + R, type
sysdm.cpl, and click OK. -
Open the Advanced tab, click Settings under Performance, and select Custom.
-
Uncheck heavy animation options like Animate controls and elements inside windows and Fade or slide menus into view, then click Apply and OK.
Turning off WebView2-powered feeds and excess desktop animations reduces Desktop Window Manager (dwm.exe) memory overhead right away.
5. Inspect Driver Memory Leaks and Check the SysMain Service
If idle RAM usage still sits unusually high after closing apps, a hardware driver may be leaking kernel memory. You can verify this in seconds without extra diagnostic software.
-
Press Ctrl + Shift + Esc and open Task Manager > Performance > Memory.
-
Look at the Non-paged pool number near the bottom of the screen. On a healthy laptop at idle, this value usually stays between 200MB and 700MB.
-
If Non-paged pool exceeds 1GB at idle, right-click the Start button and open Device Manager.
-
Expand Network adapters and Display adapters, right-click your Wi-Fi and GPU drivers, and select Update driver. If the leak began after a recent update, open Properties > Driver and click Roll Back Driver.
-
Additionally, on older 8GB laptops with heavy disk and memory spikes after boot, press Win + R, type
services.msc, and press Enter. -
Double-click SysMain, set Startup type to Disabled, click Stop, then click Apply and OK.
Because modern NVMe SSDs already launch programs quickly, disabling SysMain often lowers idle RAM on tight 8GB systems without noticeable slowdowns. However, on 16GB laptops that run smoothly, you can leave SysMain enabled.
6. Disable Fast Startup to Clear Stale Kernel Memory
Windows 11 enables Fast Startup by default. When you click Shut down, Windows actually saves the current kernel session and driver memory state to a hibernation file rather than performing a full reset. Over days or weeks, fragmented driver memory piles up and keeps idle RAM artificially high.
-
Press Win + S, type
Control Panel, and open it. -
Go to Hardware and Sound > Power Options.
-
Click Choose what the power buttons do in the left sidebar.
-
Click Change settings that are currently unavailable near the top to unlock the checkboxes.
-
Uncheck Turn on fast startup (recommended) and click Save changes.
-
Finally, open the Start menu and click Power > Restart to flush all stale kernel memory.
After completing these steps, check Task Manager > Performance > Memory and confirm that Up time resets to zero after a normal shutdown and power-on. Reviewing your Startup apps list once every few months prevents newly installed programs from creeping back into background memory and keeps both 8GB and 16GB Windows 11 laptops responsive without third-party utilities.